This chapter teaches the basics of initializing and setting up the GPU of the PSX. Areas covered in this chapter include the GPU, VRAM and the concept of display and drawing environments which are essential for better understanding how the GPU works when programming for the PSX.
This tutorial series does not and will not cover graphics programming using the LIBGS library which is a high level graphics library that adds about 100KB worth of overhead to your project (remember that the PSX only has 2MB of RAM) and hides many of the inner workings of the GPU, making it difficult to understand how to use the GPU directly and would often get in the way when trying to write your own graphics routines... While it may sound elitist discouraging the use of LIBGS as it provides facilities for rendering 3D models easily, it is better to learn how to work with LIBGPU (or PSXGPU in PSn00bSDK) in the long term as the knowledge gained from learning how to use it directly will become very important in the future for either better performance, or to accomplish special graphical effects.
Tutorial compatible with PSn00bSDK:Yes
This tutorial series begins with graphics programming as displaying a hello world message requires a bit of graphics programming, as neither the official SDK or PSn00bSDK provide a framebuffer text console for displaying text largely due to the way how the hardware works. But both provide a means of basic text drawing functions intended for debugging purposes which will be demonstrated for this chapter.
Besides, most of the satisfaction gained when learning to develop for a new platform comes from seeing the result displayed on the television screen by the console you're learning to develop for and you're going need to learn graphics programming anyway to really be able to do anything interesting with the PSX. It is a video game console afterall.
The GPU, as the name suggests, is the graphics processor responsible for doing the graphics rendering work for both 2D and 3D visuals. The block diagram shown below illustrates the relevant components that make up the entirerity of the PSX's graphics subsystem, including the MDEC and GTE hardware responsible for video playback and 3D graphics capabilities respectively.

A worrying amount often believed that the PSX's GPU is capable of rendering 3D polygons. While it may seem to be the case to the uneducated, the GPU is in fact only capable of drawing primitives in 2D space. Therefore, the GPU is incapable of perspective correct texture mapping which results in affine texture distortion and the occasional buggy near clipping seen in a lot of 3D PSX games. It was common for games to minimize the distortion by subdividing large polygons into smaller polygons with perspective correct subdivision.
The bulk of the 3D processing is instead done on the CPU which features a co-processor suited for such tasks known as the GTE or Geometry Transform Engine. The GTE is effectively an all integer math co-processor that provides matrix multiplication, vector transformations and projection operations at high speed which the CPU alone couldn't do at reasonable speed. Software would then assemble primitive packets using results from the GTE which are then sent to the GPU as a linked list via high speed DMA transfer for the GPU to draw said primitives.
The GTE will not be covered in this chapter as it is not required for simple 2D graphics programming. Whilst in the topic of the GTE, a very important issue must be taken care of and that is the GTE is NOT a Geometry Transfer Engine. An equally concerning amount belive that the GTE stands for Geometry Transfer Engine and not a Transform Engine when in fact, the GTE only does math calculations and is not capable of doing any "transfer" operations whatsoever. Also, the GTE can only be accessed by the CPU through standard co-processor related instructions. Just wanted to clarify this before going any further in learning how to program for the PSX as this bothers me to no end. Suppose it can be used to identify if one is a real PSX programmer or not.
Some often mistake that the PSX renders graphics in 24-bit color depth. Whilst the GPU is capable of 24-bit true color output, it cannot draw primitives in 24-bit color. So the 24-bit color mode is only really useful for MDEC video sequences or static images in 24-bit color.
The GPU can only draw at 16-bit color depth in a RGB5I1 pixel format (five bits per RGB component plus one mask bit used as a mask for semi-transparency effects). This aligns perfectly with the 16-bit data bus of the VRAM.
The GPU features it's own 1MB of VRAM. If you look back at the block diagram shown earlier you'll see that the VRAM is connected to the GPU and is not connected the system bus at all. This means the VRAM is not memory mapped and the CPU cannot access it directly. Instead, VRAM access can only be done through the GPU. Fortunately, transfers are done via high speed DMA.
Naturally, the GPU uses the VRAM for storing framebuffers and texture images. The most interesting aspect about the VRAM is how the GPU treats it like a 1024x512 16-bit image, with areas of VRAM addressed by (X,Y) coordinates instead of a linear memory address range. Display and drawing framebuffers as well as texture images reside as rectangular images in the VRAM. The following illustrates a typical VRAM layout for framebuffers and texture images in PSX games.

The GPU is instructed through the use of primitive packets, which are small bits of formatted data that make up a GPU command which are sent to the GPU via DMA for drawing. The primitive packets not only specify the type of primitive but also the color, semi-transparency flags, (X,Y) coordinates, texture coordinates, color look-up table to use and so forth. Think of them like arguments for a function call.
The number of arguments a primitive packet requires depends on the type of primitive. The simplest primitives such as a texture page primitive only takes one argument while the most sophisticated primitive; a texture mapped, gouraud shaded, 4-point polygon takes as many as 14 arguments. This also means the size of the primitive varies, with the texture page primitive being only a word in size while a 4-point, texture mapped and gouraud shaded polygon is 12 words long on top of the tag word present at the start of all primitives.
Further details about primitive packets will be covered in a future chapter.
Framebuffers for graphics display and drawing reside in VRAM as rectangular areas defined in (X,Y) coordinates. The size of the display area is based on the video mode (ie. the display area is 320x240 pixels when running in 320x240 mode). On the other hand, the size for the drawing area can be of any arbitrary size which may be used to render texture images for accomplishing certain render to texture based visual effects. Normally, the size of the drawing area should typically be equal to the display area.
The display and drawing areas are defined as an environment using the DISPENV and DRAWENV structs. Each struct defines various parameters that are relevant to their respective environment. The DISPENV and DRAWENV structs are initialized using SetDefDispEnv() and SetDefDrawEnv() respectively which defines the default parameters for each environment, which may be customized later for your project's requirements. Once the environments have been defined they can then be applied to the GPU using PutDispEnv() and PutDrawEnv() to make each environment effective.
Learning the display and drawing environments are mandatory for being able to get any graphical output from the PSX and this will be covered extensively in this chapter.
As obligatory as it may sound, a hello world is an effective and simple enough example to get started with PSX homebrew programming. A hello world program for the PSX can't be a simple call of printf(), unless you only want to see the output through a tty which, in all honesty, won't look as interesting as showing the message on the TV screen or emulator window.
The basic run-down of accomplishing a hello world on the PSX is to perform the following operations:
Break out your preferred text editor and begin writing the hello world program as you go along this chapter.
First, include some necessary headers in your C file. The most important of which is libgpu.h as it provides various definitions provided by the libgpu library. libgte.h is required even if you don't plan to use the GTE as libgpu.h depends on some definitions provided in it.
#include <sys/types.h>	// This provides typedefs needed by libgte.h and libgpu.h
#include <stdio.h>	// Not necessary but include it anyway
#include <libetc.h>	// Includes some functions that controls the display
#include <libgte.h>	// GTE header, not really used but libgpu.h depends on it
#include <libgpu.h>	// GPU library header
If using PSn00bSDK, replace the lib prefix with psx instead. Most of the definitions between the official SDK and PSn00bSDK are identical, so the syntax of things shouldn't be much to worry much about.
Like with any C program, you must define a main() function somewhere in your project. You can omit the argc and argv definitions if desired as they don't work on the PSX.
int main()
{
    return 0;
}
A return value cannot be passed to a parent executable as the kernel does not save the value for the caller to receive it, but is required nonetheless to keep the compiler from complaining about returning without a value.
The very first thing to do before anything else in your PSX program is to call ResetGraph(). ResetGraph() not only resets the GPU as the name suggests, but it also enables interrupts which are mandatory for getting anything done on the PSX. If ResetGraph() is not called functions that depend on interrupts such as VSync() and several other things will not work, and will usually appear as though your program just crashed.
// Reset GPU and enable interrupts
ResetGraph(0);
Resetting the GPU also masks out the video output which results in a black screen, but the console still produces video sync. The video output is enabled again using SetDispMask(), ideally after a DISPENV has been defined and applied to the GPU for a smooth transition from a previously running program (ie. the startup screen). As ResetGraph() does not clear the contents of VRAM, so whatever was drawn by the previous program still remains when your program takes over. Clearing the VRAM is generally not required in most well coded scenarios.
Start by defining two DISPENV and DRAWENV variables as arrays in your code. Define an int which will be used for keeping track of things which will make total sense later on. This value must be set to zero as part of your graphics initialization code just to make sure the variable starts with a value of zero.
// Define environment pairs and buffer counter
DISPENV disp[2];
DRAWENV draw[2];
int db;
Next is to define the DISPENV pair. Initializing the DISPENV structure is easiest done using the SetDefDispEnv() function with simple arguments.
For NTSC users:// Configures the pair of DISPENVs for 320x240 mode (NTSC) SetDefDispEnv(&disp[0], 0, 0, 320, 240); SetDefDispEnv(&disp[1], 0, 240, 320, 240);For PAL users:
// Configures the pair of DISPENVs for 320x256 mode (PAL) SetDefDispEnv(&disp[0], 0, 0, 320, 256); SetDefDispEnv(&disp[1], 0, 256, 320, 256); // Screen offset to center the picture vertically disp[0].screen.y = 24; disp[1].screen.y = disp[0].screen.y; // Forces PAL video standard SetVideoMode(MODE_PAL);
This defines both DISPENVs for 320x240 resolution mode (320x256 if you used the PAL snippet) which is the most commonly used video mode. The first DISPENV is set with a position of (0,0) while the second DISPENV is set with a VRAM offset of (0,240). You might be wondering why it has to be defined that way.
Next is to define the DRAWENVs. Much like the DISPENVs you use SetDefDrawEnv() to initialize the DRAWENV structure with simple arguments.
For NTSC users:// Configures the pair of DRAWENVs for the DISPENVs SetDefDrawEnv(&draw[0], 0, 240, 320, 240); SetDefDrawEnv(&draw[1], 0, 0, 320, 240);For PAL users:
// Configures the pair of DRAWENVs for the DISPENVs SetDefDrawEnv(&draw[0], 0, 256, 320, 256); SetDefDrawEnv(&draw[1], 0, 0, 320, 256);
Unlike DISPENV, DRAWENV can be of any arbitrary size for the drawing environment. But generally it should be equal to the size of the DISPENV defined, so the drawn area will align perfectly with the display environments. Additionally, you'll want to set some parameters within the DRAWENV struct to enable background clearing as otherwise you'll get a hall of mirrors effect. The background clear takes effect as soon as the DRAWENV is applied to the GPU using PutDrawEnv().
// Specifies the clear color of the DRAWENV setRGB0(&draw[0], 63, 0, 127); setRGB0(&draw[1], 63, 0, 127); // Enable background clear draw[0].isbg = 1; draw[1].isbg = 1;
Finally, apply the DISPENV/DRAWENV environments to the GPU to apply the new video mode and drawing environment to achieve a seamless transition.
// Apply environments PutDispEnv(&disp[0]); PutDrawEnv(&draw[0]);
To keep your code look neat and tidy, you'll want to put all the graphics init code inside a function, to keep your main() function from looking messy and will make expanding the program easier in the future.
You may have noticed that the DRAWENV pairs are somewhat positioned in the opposite order as the DISPENV whilst writing the graphics init code and are probably wondering why this is the case instead of a DRAWENV directly overlapping a DISPENV. This is how you implement double buffered rendering on the PSX and is a standard feature to have when writing real-time graphics code, not just on the PSX but on almost any system with a framebuffer.
If you're not familiar with the concept, you basically need to allocate two framebuffer areas; one for display and one for drawing. The way you use these framebuffers is you use one buffer as the display buffer, which is the buffer the graphics hardware will display on the screen and the other as the drawing buffer, where all your graphics operations should draw to and is not shown on the screen. Once drawing is complete the two buffers switch places, the drawing buffer becomes the display buffer and the display buffer become the drawing buffer for the next frame to be drawn and the cycle repeats. This basically guarantees that only completed frames are shown on the screen which yields seamless graphical animations even during framerate drops when intensive visuals are being drawn aside from the natural reduction of smoothness.

Having a DISPENV and a DRAWENV simply overlap one another on the same area counts as single buffered rendering and whilst you may get away with it, the amount of things you can draw/process will be severely limited as you'll get nasty flicker if the drawing/processing does not complete before the v-blank period ends. So, a double buffered rendering scheme is much preferred.
Now the last thing that deals with the DISPENV and DRAWENV
environments to write is a so called display function, which is basically
a function that does the all buffer swap stuff in a single call for
convenience. Calling the display function should be done at the end of your
loop as that is usually where all graphics operations have completed
and are ready for drawing or display. For this tutorial, the display function
will be named
Before performing a buffer swap, you must first call DrawSync() then VSync(). As the names suggests these functions waits for the GPU to complete any drawing operations and waits for the vertical blanking period respectively. Waiting for DrawSync() is important as it makes sure that the GPU has completed drawing any primitives as otherwise you may get flicker or possibly instability. Waiting for VSync() is also important as it not only caps your program loop to the TV refresh rate (60fps for NTSC, 50 for PAL) but it also prevents screen tearing which will happen if you swap buffers without waiting for the v-blank period.
// Wait for GPU to finish drawing and V-Blank DrawSync(0); VSync(0);
Now the next step is to perform the buffer swap. If you remember that variable
named
// Flip buffer counter db = !db;
Then apply the environment pair based on the value of
// Apply environments PutDispEnv(&disp[db]); PutDrawEnv(&draw[db]);
And finally, call SetDispMask() to lift the display mask so you get picture instead of a black screen, as ResetGraph() masks the display by default.
// Enable display SetDispMask(1);
To make sure you're right on track, here's a listing of what the code should look like.
#include <sys/types.h> // This provides typedefs needed by libgte.h and libgpu.h
#include <stdio.h> // Not necessary but include it anyway
#include <libetc.h> // Includes some functions that controls the display
#include <libgte.h> // GTE header, not really used but libgpu.h depends on it
#include <libgpu.h> // GPU library header
// Define environment pairs and buffer counter
DISPENV disp[2];
DRAWENV draw[2];
int db;
void init(void)
{
// Reset GPU and enable interrupts
ResetGraph(0);
// Configures the pair of DISPENVs for 320x240 mode (NTSC)
SetDefDispEnv(&disp[0], 0, 0, 320, 240);
SetDefDispEnv(&disp[1], 0, 240, 320, 240);
// Configures the pair of DRAWENVs for the DISPENVs
SetDefDrawEnv(&draw[0], 0, 240, 320, 240);
SetDefDrawEnv(&draw[1], 0, 0, 320, 240);
// Specifies the clear color of the DRAWENV
setRGB0(&draw[0], 63, 0, 127);
setRGB0(&draw[1], 63, 0, 127);
// Enable background clear
draw[0].isbg = 1;
draw[1].isbg = 1;
// Apply environments
PutDispEnv(&disp[0]);
PutDrawEnv(&draw[0]);
// Make sure db starts with zero
db = 0;
}
void display(void)
{
// Wait for GPU to finish drawing and V-Blank
DrawSync(0);
VSync(0);
// Flip buffer counter
db = !db;
// Apply environments
PutDispEnv(&disp[db]);
PutDrawEnv(&draw[db]);
// Enable display
SetDispMask(1);
}
int main()
{
// Initialize graphics and stuff
init();
// Main loop
while(1)
{
display();
}
return 0;
}
Now that you've written a considerable amount of code for the graphics init and buffer swapping stuff, it should be possible to compile the code and see an output to check if you're right on track. In the official PsyQ/Programmers' Tool SDK compiling can be done through ccpsx with a single command line. ccpsx is actually a front for the C, C++ and linker that makes using the SDK's toolchain easier.
ccpsx -O2 -Xo0x80010000 hello.c -o hello.cpe
If you've worked with C before, you should already know that
The executables ccpsx produces are in CPE format which cannot be booted from the CD by the PSX and most emulators don't support it. You'll have to convert the executable into the usable PS-EXE format which can be done using cpe2x.
cpe2x hello.cpe
Don't be fooled by the .EXE file extension of a PS-EXE executable file. The executable files cpe2x produces are neither MS-DOS or Windows executable programs.
If using PSn00bSDK. It is more complicated to compile a program from within the command line alone due to the way how the toolchain is currently set up. It is much easier to just copy a makefile from one of the examples included in the SDK and tweak the variables for your project. Then use make to compile the program and it should produce an ELF file and a PS-EXE file.
Run the program and you should get a solid blue image.

Now that the graphics environment and display routines have been implemented, the next step is to draw the hello world message. This is easily done by using the debug font functions FntLoad(), FntOpen() and FntPrint(). These functions are not suited for general use. Such as in a game title as it does not support any form of customization and does not support lowercase letters, but is good enough for testing and debugging purposes which will be useful later. These functions are provided by libetc, or psxetc in PSn00bSDK.
The first thing to do before the debug font functions can be used is to is load the font texture onto VRAM using FntLoad(). The font texture can be placed anywhere in the VRAM area provided it doesn't get overwritten by display/draw areas, or textures being loaded onto VRAM. For this tutorial, the font texture will be placed at (960,0).
Next is to create a text stream using FntOpen() which defines the area where the text will be drawn at. For this tutorial a text stream of 100 characters is defined to fill the entire screen, with some overscan compensation to ensure that the text is visible on the TV.
// Load the internal font texture
FntLoad(960, 0);
// Create the text stream
FntOpen(0, 8, 320, 224, 0, 100);
The font area coordinates are draw-area relative and not VRAM relative, so there is no need to define another font area for each of the display/draw areas in the VRAM. The third argument specifies if a black background for the font area should be drawn. In PSn00bSDK, you can specify 2 for a semi-transparent black background. If you try to set it to a non-zero value, the background will turn black because the font area covers the entire screen.
FntOpen() allows defining multiple font areas by saving the return value to a persistent variable and passing it as the first argument of FntPrint() and FntFlush(). Up to eight font areas can be defined at once, but it cannot be closed or redefined later in your program.
FntPrint() prints text to the last defined font area and works more
or less like printf() and you can also use the newline character
sequence
FntPrint("HELLO WORLD!");

FntFlush(-1);
display();
Calling FntPrint() alone is not enough to display text to the current draw area, so FntFlush() needs to be called to actually draw the characters printed from FntPrint() calls.
Compare your code against this listing to make sure you're right on track.
#include <sys/types.h>	// This provides typedefs needed by libgte.h and libgpu.h
#include <stdio.h>	// Not necessary but include it anyway
#include <libetc.h>	// Includes some functions that controls the display
#include <libgte.h>	// GTE header, not really used but libgpu.h depends on it
#include <libgpu.h>	// GPU library header

// Define environment pairs and buffer counter
DISPENV disp[2];
DRAWENV draw[2];
int db;

void init(void)
{
    // Reset GPU and enable interrupts
    ResetGraph(0);

    // Configures the pair of DISPENVs for 320x240 mode (NTSC)
    SetDefDispEnv(&disp[0], 0, 0, 320, 240);
    SetDefDispEnv(&disp[1], 0, 240, 320, 240);

    // Configures the pair of DRAWENVs for the DISPENVs
    SetDefDrawEnv(&draw[0], 0, 240, 320, 240);
    SetDefDrawEnv(&draw[1], 0, 0, 320, 240);

    // Specifies the clear color of the DRAWENV
    setRGB0(&draw[0], 63, 0, 127);
    setRGB0(&draw[1], 63, 0, 127);

    // Enable background clear
    draw[0].isbg = 1;
    draw[1].isbg = 1;

    // Apply environments
    PutDispEnv(&disp[0]);
    PutDrawEnv(&draw[0]);

    // Make sure db starts with zero
    db = 0;

    // Load the internal font texture
    FntLoad(960, 0);
    // Create the text stream
    FntOpen(0, 8, 320, 224, 0, 100);
}

void display(void)
{
    // Wait for GPU to finish drawing and V-Blank
    DrawSync(0);
    VSync(0);

    // Flip buffer counter
    db = !db;

    // Apply environments
    PutDispEnv(&disp[db]);
    PutDrawEnv(&draw[db]);

    // Enable display
    SetDispMask(1);
}

int main()
{
    // Initialize graphics and stuff
    init();

    // Main loop
    while(1)
    {
        FntPrint("HELLO WORLD!");

        FntFlush(-1);
        display();
    }

    return 0;
}
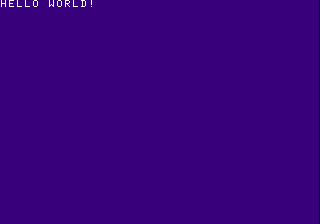
Run the program on the console or emulator and you should see a dark purple picture:
This concludes this chapter of Lameguy64's PSX Tutorial series. You should be very familiar of how framebuffers are handled on the PSX hardware and should be ready to take on drawing proper graphics primitives.
A few things you may want to experiment with this example yourself:
The next tutorial will cover how to draw graphics with the GPU using ordering tables and primitive packets.
| Previous | Back to Index | Next |